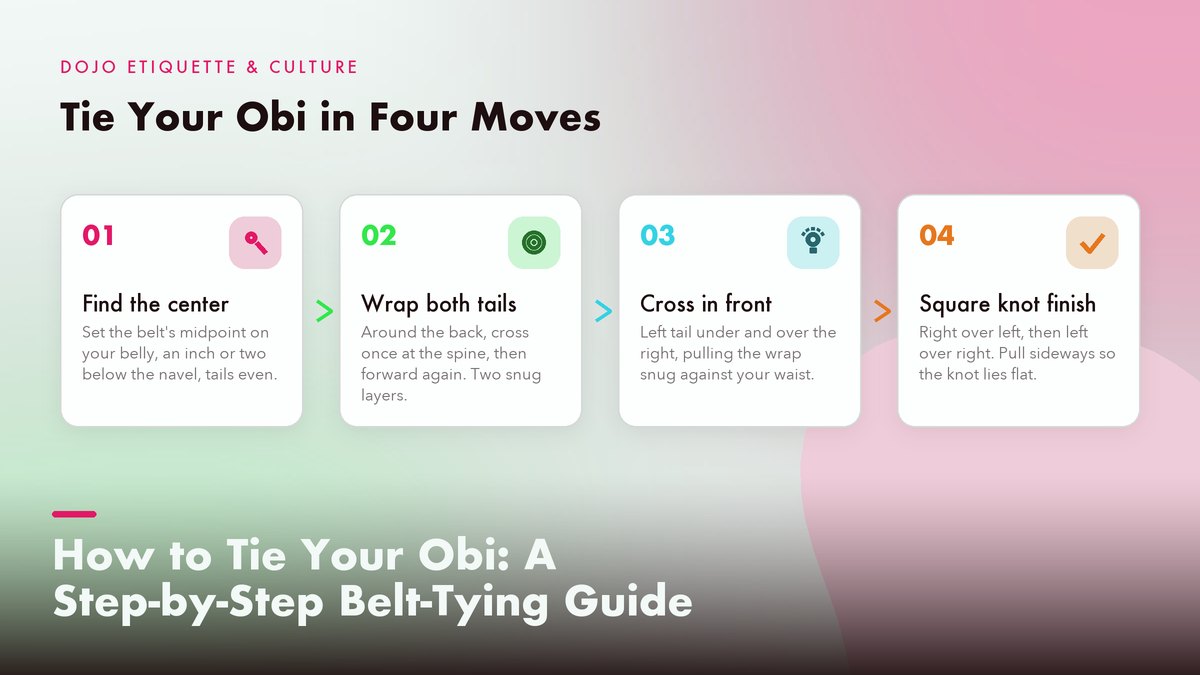
The obi is the first thing you put on before class and the last thing you take off, and yet most beginners tie it badly for years. This is the proper wrap and knot, the mistakes that leave belts loose or lopsided, and how to fix them without holding up the line.
I tied my belt wrong for the better part of four months before anyone corrected me, and the only reason they finally did was that my knot migrated around to my spine every single class and landed directly under me every time I took ukemi. Rolling across your own belt knot is a small, stupid discomfort. It won’t injure you, but it makes every fall a little worse, and nobody mentions it because everyone assumes someone else already told you. This guide is the correction I wish I’d gotten on day one. It’s written for new aikido students in the US and Canada, it assumes zero experience, and it walks through the whole job from finding the center of the belt to tying the flat square knot that aikido shares with karate, plus the handful of mistakes that leave a belt loose or sitting crooked. If your first class is coming up, you can practice at home in front of a mirror. By the time you bow in, you’ll tie it the way the senior students do, which is to say without thinking about it at all.
What Your Obi Actually Is
Before the how, thirty seconds of what. Obi is simply the Japanese word for a sash, and it’s far older than any martial art. The obi as a sash has been part of Japanese dress for centuries, and martial artists borrowed it because a wide wrapped band does an excellent job of keeping a training jacket closed while marking rank. In aikido dojos you’ll usually get a white belt to start, then progress through the kyu grades toward black. The grading structure that uses these colors is standard across most Japanese martial arts, and the dan and kyu ranking system behind it was systematized in the 19th century before being adopted by the art’s early organizations, including what became today’s Aikikai Foundation in Tokyo, headquarters body for the largest aikido lineage.
A few practical differences from other arts matter once you start tying. An aikido obi is wide, typically about 4 inches, and it’s meant to be wrapped around the waist twice. It’s softer than a judo belt, which is built to be gripped and yanked. And unlike a karate belt, which many styles fold and stitch stiffeners into, an aikido belt is usually plain dyed cotton. That last point sneaks up on you. A new belt is stiff and flat and cooperative. After a few dozen sweaty classes it turns soft and starts willing to twist, which is when most of the mistakes below get invented. The methods in this guide work at every stage, but expect a brand-new obi to fight you slightly until it breaks in.
Whatever rank color you’re wearing, the belt changes nothing about safety on the mat. And if this is your first month of training, our overview of aikido basics for new students is a good companion read for the terminology used here.
Getting Oriented Before You Wrap
Ninety percent of lopsided belts are decided in the first three seconds.
Every wrap starts the same way, and doing that part deliberately is the difference between a belt that sits straight all class and one you adjust after every technique. Hold the belt in both hands and find the exact center point. Most aikido and karate belts have a seam or a small stitched label marking the middle, and if yours doesn’t, fold it in half and pinch the fold. That midpoint anchors the whole operation. Nearly every crooked belt I’ve seen started exactly there. Start at one end, skip the center, and the whole wrap is doomed from the first pass around your waist.
Set the center of the belt flat against your stomach, a couple of inches below your navel, with the stitched label (if there is one) facing out against your body. Both tails hang down in front, roughly even. Five seconds, once it’s a habit.
One choice deserves a moment of thought, because your dojo has an opinion about it even if nobody has mentioned it yet. When the tails cross in front, most aikido and karate dojos expect the right tail to cross over the left. Mechanically it makes no difference at all. What matters is consistency, because a wrap that always crosses the same way produces a flat square knot every time, while swapping the order at random produces the twisted granny knot that every beginner eventually complains about. Pick the convention on day one and never improvise again.
The Standard Wrap, Step by Step
This is the sequence used in the overwhelming majority of aikido dojos. Some styles teach minor variations in where the belt sits or how the tails cross, so if your instructor shows something different, do it their way and treat this as the default you’ll come back to.
- Start at the center, low on the belly. Set the midpoint of the obi flat against your stomach a couple of inches below the navel, both tails hanging even in front of you.
- Send both tails behind you. The right one goes around your right side, the left around your left. Keep the wrap snug rather than tight. You should be able to breathe and squat without the belt biting.
- Cross once at your spine. Where the tails meet in back, let them pass over each other, right over left, so each one continues toward the opposite side of your waist.
- Bring them home to the front. The right tail now rounds your left side and the left tail rounds your right, and both hang in front of you again. Two layers, anchored against your body. That anchored feeling is the whole point of the double wrap, and you should feel it well before you ever touch the knot.
- Even the tails. Slide the belt around until the hanging ends match. If one end reaches your knee while the other barely exists, your center point drifted during the wrap. Undo it, re-center, start over. Fifteen seconds.
Wrapping too loosely is the most common failure at this stage, by a wide margin. A belt wrapped with slack between its two layers rotates around your waist the moment you pivot hard or take a fall, and a rotated belt drags everything sitting on top of it along for the ride. Snug means the belt moves when your body moves, not when your jacket moves. My rough test, which I stole from watching a fourth-dan, is two flat fingers under the wrap. If they slide in comfortably, the tension is right.
Tying the Knot So It Lies Flat
What you’re after is a square knot, the same one sailors use to join two lines that need to hold under load, and it has one quality that matters enormously on the mat. It lies flat. A flat knot doesn’t dig into your stomach when you bow, and it doesn’t form a hard pebble under your spine when you’re thrown. Keep the same right-over-left convention from the wrap and work through it slowly.
- Lay the right tail over the left, then tuck it up under both strands. Pull it through toward you and snug it down.
- Swap for the second pass. Whichever tail ended up on top after the first pass now crosses over the other, tucks under, and comes through. Two half-knots, opposite directions.
- Set it sideways. Pull both tails outward, horizontally, instead of straight down. Pulling down rolls the knot into a cylinder. Pulling across seats it flat against the wrap.
- Check the ears. A finished square knot shows two short, roughly even tails pointing off to the sides like a flat little bow. They should rest on top of the wrap itself and read as a small horizontal rectangle sitting on your stomach.
Why does this knot stay put when the beginner’s knot doesn’t? The answer lives in which tail crosses on top. A square knot is really two half-knots stacked in opposite directions, and the opposing tensions lock each other in place. Cross the same way twice and you get a granny knot, which looks nearly identical for about ten minutes before it twists sideways, loosens, and unties itself in the middle of class. If your knot has ever rotated so the ears point up and down instead of side to side, or if you’ve found your belt trailing on the mat after a hard fall, you were tying a granny knot. The fix is embarrassingly simple. Alternate which tail crosses on top, every time, without exception.
A belt that comes untied in class is almost never a knot problem. It’s a wrap problem. Tie a tidy square knot on a loose, twisted wrap and you’ve built something neat on a moving foundation.
Common Mistakes and How to Fix Them
These are the failures I see most in beginner classes, listed roughly in the order they annoy you by the end of an hour. If your belt never quite feels right, one row of this table is probably your culprit.
| What it looks like | Why it happens | The fix |
|---|---|---|
| Your belt rotates around your waist all class | Wrapped too loosely, or one layer twisted so the belt can slide over itself | Rewrap snugly and run a hand around your back to flatten both layers before you tie |
| Knot twists sideways and works itself loose | Crossing the same tail over the top twice, which is a granny knot | Alternate the crossing tail. If the finished knot’s ears point up-down, redo it |
| One tail hangs to your knee, the other barely exists | Started wrapping from one end instead of finding the belt’s center first | Start over at the center point. Uneven tails can’t be fudged by the knot |
| It migrates over your spine | Tails crossed unevenly at the back, so the front junction slides around to the rear | Cross the tails crisply at the spine and keep even tension on both as you bring them forward |
| Knot digs into your stomach when you bow or roll | Tied too low over your stomach, or cinched downward instead of sideways | Set the knot a touch higher and seat it with sideways pulls so it stays flat |
| Belt twists into a rope down your back | A layer flipped over itself during the wrap, common with stiff new belts | Smooth each layer flat as you wrap. A twisted layer is a loose layer |
| Belt edges roll and curl after washing | Machine-washed and dried, which shrinks and torques the cotton | Hand wash cold, air dry flat, and fold it neatly instead of cramming it in a bag |
Notice how few of those fixes involve the knot itself. That’s the real lesson of belt-tying, and it’s the one that transfers. Most things that look like finishing problems are setup problems wearing a disguise.
The granny knot, diagnosed properly
Since it causes more grief than everything else combined, the granny knot earns its own paragraph. The tell sits in the shape of what you’ve just tied. After your first pass, pause and look at the tails. In a correct sequence, whichever tail ends up on top is the one you cross over for the second pass. Catch yourself reaching for the same tail twice and stop. Swap. There’s a second diagnostic too, and it’s nearly foolproof. A square knot lies flat with two horizontal ears, while a granny knot always curls, because both passes torque the same direction and the knot has no opposing tension to rest against. Spot the curl once and you’ll catch yourself mid-tie within a week. After a month you won’t think about it at all.
Tying Someone Else’s Belt
Helping a partner with their belt comes up constantly in beginner classes, and there’s a courteous way to do it. Stand facing them, take the two tails they’ve brought around, and tie the knot as if it were your own, keeping the same right-over-left convention. Two rules apply. Don’t yank the tails to cinch it, because their snug is your snug, and a belt tied too tight is miserable for the next hour. Tie on their front, centered, unless your dojo has a specific custom about placement, since a knot tied off to one side is usually a mistake rather than a style statement. A quick mutual bow afterward, and you’re done.
Kneeling shifts the geometry. When you tie for someone while both of you are in seiza, the belt sits higher on their torso relative to your hands, and it’s easy to set the knot too low so it slides down the moment they stand. Compensate by placing it a finger’s width higher than feels natural. Belts settle downward as the fabric relaxes, and a knot that’s correct for standing is slightly loose for kneeling.
Folding Your Obi After Class
Now we leave mechanics and enter culture, briefly. In traditional dojos the belt counts as more than equipment, and how you handle it off the mat is part of the etiquette you’ll absorb whether anyone spells it out or not. The standard after-class routine goes like this. Untie the knot, find the center, fold the belt in half lengthwise, then fold or roll it from the center outward into a compact bundle. Some students just drape theirs over the hanger with the gi jacket, which is equally respectable. What gets frowned on is wadding it into a ball and stuffing it in your bag. Partly that’s about the creases. Partly it just looks careless, and carelessness with your own gear reads as carelessness with the dojo’s customs.
A handful of dojos take this further and ask that you never wash a black belt at all, treating the accumulated wear as a record of your training. That’s a custom, a preference, and it varies widely between organizations and lineages. A white or colored belt will need the occasional wash, and the method matters more than the frequency. Hand wash in cool water with a small amount of mild detergent, rinse thoroughly, and air dry flat away from direct sun. A machine dryer shrinks the belt unevenly, torques the seam at the center mark, and sets wrinkles that never fully come out. However you fold or wash it, the principle underneath is the same one that runs through everything else in the dojo, from how you bow to how you treat the mat. The small repeated acts are the practice.
Worth reading about from people who’ve spent decades inside that culture. Aikido Journal has published for years on the history and customs underneath techniques like this one, and the long-running community at AikiWeb has forum threads going back to the earliest days of the web in which students trade exactly these small practical details. If you want to know whether your dojo’s belt-washing custom is common or odd, that’s the place to ask.
A Short Pre-Class Checklist
Everything above compresses into about twenty seconds of actual work. Run through it in your head facing the mirror in the changing room.
- Center the belt first. Midpoint against the belly, a couple of inches below the navel, tails even.
- Wrap twice, snug but breathing. Cross crisply at the spine, then bring both tails back around to the front.
- Match the tails. No knee-length ends, no stubs. Fix this now rather than after the knot.
- Tie right over left, then left over right. Alternate every pass so the knot can never become a granny.
- Seat it sideways. Pull horizontal so the knot lies flat, ears pointing side to side.
- Hand check. Run a palm around your back. Both layers flat? Then bow in.
Do that every class for a month and you’ll stop doing it consciously, which is the actual goal of almost everything in a dojo. The belt is a small, ordinary object. Learning to handle it well is a small, ordinary skill. But small ordinary skills done without thought are what the whole thing is made of, from your first white belt to whatever rank is decades down the line.
Sources and notes. Wrapping and knot methods here follow common practice in Aikikai-affiliated and independent aikido dojos across the US and Canada; individual schools vary in details like knot placement, so follow your instructor’s version when it differs. External links were checked and working as of October 2026. Related reading on this site: What Is Aikido? The Art and Its Basics Explained for New Students, What to Expect at Your First Aikido Class, and Dojo Etiquette for Beginners.
Leave a Reply